Showing posts with label Craft Fair Projects. Show all posts

Thursday, November 10, 2022

OSAT Blog Hop Festive Season Blog Hop

Happy Thursday! Long time no blog for me right? I have to be honest, the craft room really hasn't been a joyful place in the last few months... but I have been working my way back and have some joy again! I think I just needed a break... the kids schedule continues to be somewhat grueling with Taryn managing middle school boys basketball and our football team still in the hunt for the state championship. Throw in some sewing for Taryn and church youth group... 

This month the OSAT Team is hopping with the theme "Festive Season" and I don't know about you but I am soooooo ready for Christmas. Not sure why, maybe its the walks through Hobby Lobby the last two weekends or the Christmas Bazaar that I will be participating in... I am feeling quite festive myself! So for today's creations I have combined the Jingle Jingle Jingle with the Celebrate With Tags Bundle for this fun and jolly card!
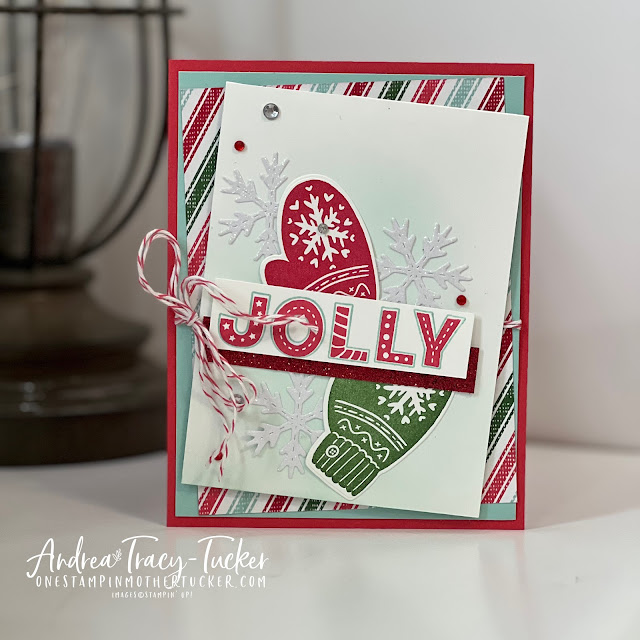

This card was so fun to make, it started with the a piece of our Basic White cardstock cut to 3.75" x 5". Towards the bottom left corner I used one of our Blending Brushes with a bit of Pool Party ink to give a soft "snow" like background. I stamped two of the mittens from the Celebrate With Tags, one in Garden Green and the other in Real Red. I then die cut them with the coordinating die from the bundle. I then die cut the cute little stitched snowflakes also in the Celebrate with Tags dies out of the White Glimmer Paper (which unfortunately is unavailable). Once I had these arranged the way I liked them, I adhered them with a bit of Multipurpose Liquid Glue. To coordinate with the Sweetest Christmas DSP, I stamped the word Jolly from the Jingle Jingle Jingle stamp set in Sweet Sorbet ink and then the outline with Pool Party ink. A bit of Red and Clear Rhinestones were just the right touch with the Red Glimmer Paper strip. This is all nicely layered onto a great multicolored stripe from the Sweetest Christmas DSP and a bit of the Sweet Sorbet Bakers Twine!
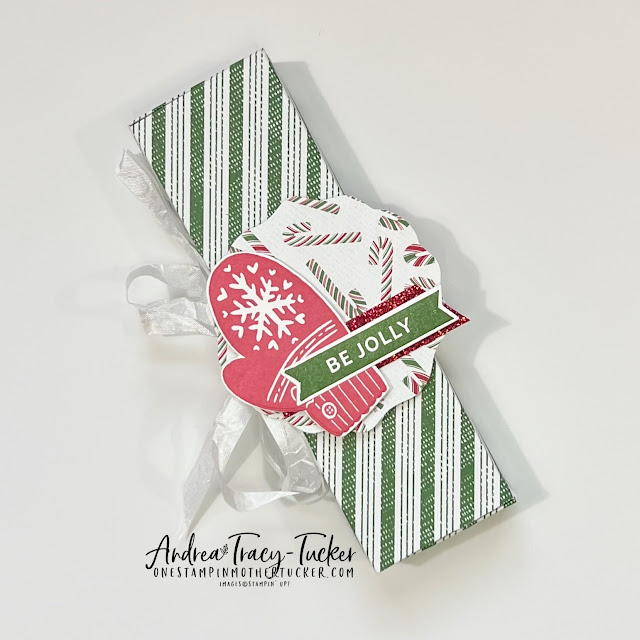

I stumbled on this box a week or so ago on Pinterest! It holds 5 nuggets and can be dressed up or down... You can even stack a few together and wrap a belly band around it! You can find the tutorial here . I decided to doll it up with a bit of our White Crinkled Seam Binding Ribbon, a Sweet Sorbet Mitten, Red Glimmer Paper and fun sentiment from the Celebrate with Tags! As you can see below, I have also wrapped my chocolates with coordinating DSP.


I am so glad that you chose to stop by today to see my festive side! I can't wait for you to see what my friends have created too! You can click along the list below to tour the hop!


Thursday, November 7, 2019

OSAT Winter Festival Blog Hop

Happy Thursday!  I am back with One Stamp At A Time blog hop... I know that we are a bit early... but myself and a bunch of my Stampin' Up! friends are going to OnStage next week and I would have hated to interrupt their travels if anything on the hop had gone wrong!

Today we are hopping with the theme Winter Festival! I am up to my eyeballs in creating and assembling for a craft fair this weekend so I decided to give you guys a sneak peek!!


My creations today came together fairly simply. I made a set of 5 cards like the one above with the Night Before Christmas Designer Series Paper. It has a nice Stitched Circle of the DSP and a punched tree from the Perfectly Plaid Bundle in Old Olive. My Sentiment is stamped in Cherry Cobbler, in fact I used my Stamparatus on this set of cards so that the sentiment was in the same place on each one. This is accented with a nice strip of Gold Foil and a Crumb Cake stamped pine cone.

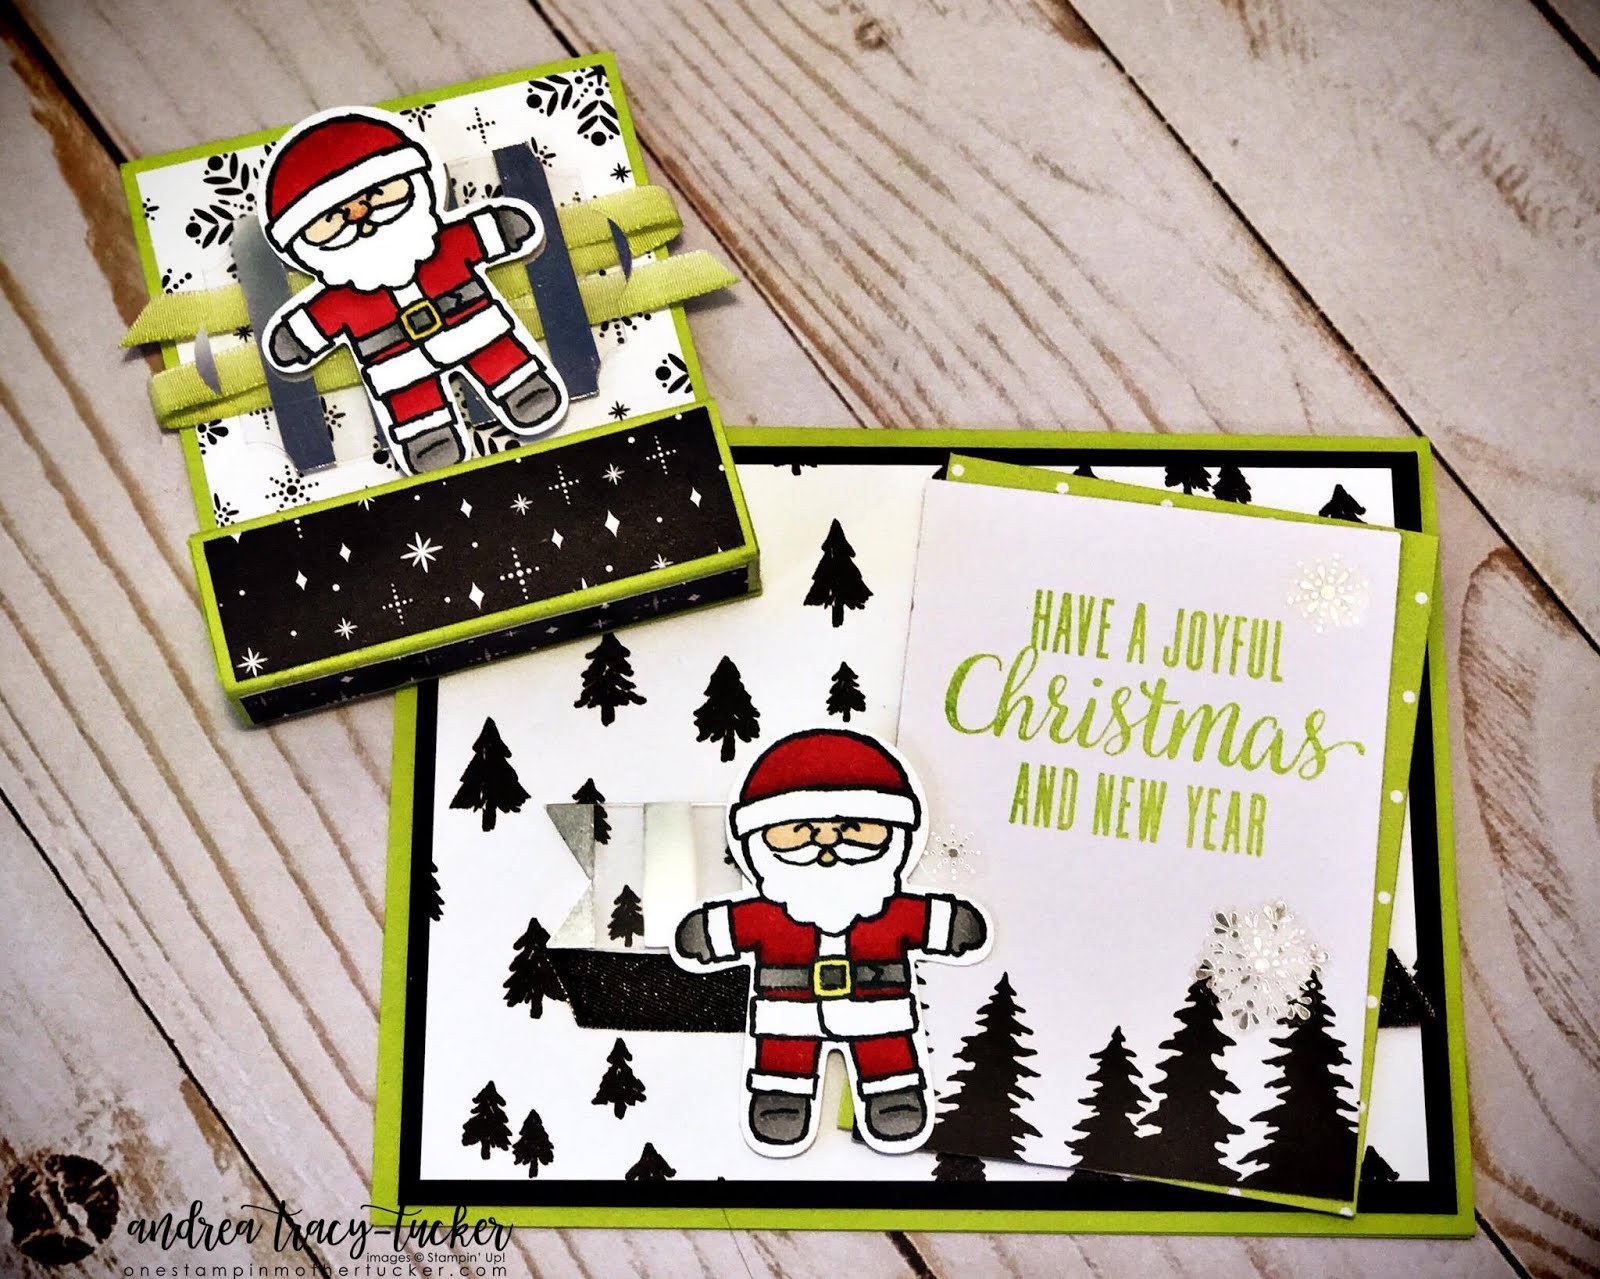
The treat holder has a nice base of Sahara Sand. I stumbled on this tutorial last Christmas and decided that these would be great for the craft fair. Again I have used the Night Before Christmas DSP and the coordinating Memories and More cards. I have used the same Stitched Circle Die to cut the Santa seal and adhered it with Stampin' Dimensionals. This is nicely accented with the Gold Metallic edge Very Vanilla Ribbon!

I am so glad that you have stopped by today! I can't wait for you to see what my friends have created for you today!


Sunday, November 5, 2017

Creation Station Perfect Packaging Blog Hop

The first Sunday of November and somehow yesterday felt like spring! Creation Station is back with a Perfect Packaging Hop, or anything but a card! As you can tell, I went a bit rogue!


With OnStage only days away I have been feverishly working on Swaps! I know many of you are in the same boat! It will be interesting to see how the week turns out with Troy being on his own with the 3 kids. Although I am missing out on one of my biggest craft fairs and the Cajun Boil! The flip side of this is that the kids get to go to their first one! It will be nice for them to get to do something special with just Troy. His work hours seem to consume what could be family time at times. Nature of the beast when your job is to help the farmers.


I know, it isn't packaging!!!!! But my rules did say anything but a card!!!! This is ANYTHING but a card! This cute little easel calendar/post it note holder seemed so perfect for this hop! The base is in beautiful Berry Burst with a matte of Lemon Lime Twist. The leaves from the Oh So Eclectic Bundle are stamped with Lemon Lime Twist ink and die cute with coordinating die. The lovely flower towards the top  adhered with a Stampin' Dimensional was colored using the Stampin' Blends Pool Party markers with the light Pumpkin Pie marker as the center. I used the diamond patter die with a 2"x 4" strip of Night of Navy. My calendar is matted onto a nice piece of Peekaboo Peach with a strip of Tear N Tape.

To make the base of this I simply used my Stampin' Trimmer and cut a 4.25" x 11. You score this on the long side at 5.5" and 2.75". This creates your easel stand. You will need to cut a 5.5" x 4.25" for the base of your calendar front! Easy right? You can matte, layer or use whatever DSP you would like!

Thank you so much for stopping by! I can't wait to show you what the amazing Holly Stene has next for you! You can get to her by clicking the next button below, and if you want to go backwards, the fabulous Mikaela Titheridge is before me and you get to her by clicking Go Back below!

Have a great Sunday!


Mikaela Titheridge
Holly Stene


Thursday, November 2, 2017

OSAT Winter Holiday Blog Hop

Happy Thursday! One Stamp At A Time blog hop is coming to you this month about a week earlier than the norm! This is because many of us will be attending Stampin' Up! OnStage next week and we don't want anything to go wrong while we are all learning about top secret stuff!


This month we are hopping with the theme Winter Holidays! I just couldn't wait to make this modern Christmas creation! Did you get to me by way of the amazing Australian Demo Jessie Holton? If so welcome! I can't wait to show you what I have made!


Jenny Hall


Tuesday, May 16, 2017

Stamp Ink Paper 99 Packaging Challenge

Happy Tuesday! The weather here has been so crazy with really gusty winds over night. It really rattles my nerves. Although I like getting great weather and cloud pictures, I would prefer the wind not shake my house and flip stuff over!


This week the design team for Stamp Ink Paper is challenging you do some Packaging! There are so may dies and ready to decorate packaging products out there for us to play with. I honestly started to do something entirely different but then I remembered that I had this super cute acetate boxes. Let me show you what I have done... 


This fun little acetate box is the Clear Tiny Treat Box. I decided to spruce this little cutie up using the Delightful Daisy DSP with the Daisy Delight Bundle! I used fringe scissors to create the "packing" inside of the box. I took 1.5" strip of the Delightful Daisy DSP and wrapped it around the box  so that it overlapped and adhered it with Tear N Tape so that it could easily slide off the box. I tied a doubled strand of Linen Thread in a lovely bow to make my cute little loops with my 5/8 Burlap Ribbon. I just can't get enough of this Daisy Delight Bundle. I stamped three onto the Watercolor Paper in Daffodil Delight and then used our Daffodil Delight and Pumpkin Pie Watercolor Pencils to color in the Daisy. After I adhered the three together with Glue Dots, I added a Gold Faceted gem and a Stampin' Dimensional and popped it onto the top! Adorable right? 

I can't wait to see what you make with this fun challenge that will really get you thinking outside the box!


Tuesday, February 28, 2017

Stamp Ink Paper Anything But A Card Challenge

Happy Tuesday! Of course it is another Monday like Tuesday because the kids had yesterday off AGAIN! Joshua had a great time at his wrestling tournament earning 5th place and FINALLY grasping the fact that he can't let the other person pin him! He looked over at the beginning of the 3rd period of his last match and hollered "MOM! This is the longest match ever!". We are so proud of him!

Today I am creating with the Stamp Ink Paper Design Team and our challenge is ANYTHING but a card! So took the opportunity to make this fun little altered magnetic to do list!


I started off with a whole other idea in mind but when I realized another design team member had already used the egg cartons, I decided to do something with these fun little note pads I found on clearance at Dollar General! This is a quick and easy project that you can even up it a little with a coordinating pen or clothespins.

 I simply cut the white piece of card stock that is used in the DSP packs. It was cut at 5.5" x 9.5". I also cut my Basic Black Card Stock to the same size and adhered it to the base with Liquid Multipurpose glue. The Pop of Pink DSP was perfect for my note pad. I the Pink with White Polka Dot was cut at 5.25" x 9.25". My quick little decorative strip on the left was cut at 1.5" x 9.25" with a coordinating strip at 1.25" x 9.25" to go over the top!

You really could embellish this any way you want to!
Thank you so much for stopping in! Just remember ANYTHING BUT a Card!
Have a great day!

Thursday, November 10, 2016

OSAT Blog Hoppers Let It Snow


Happy Thursday! It is the second Thursday of the month and we all should know what that means... One Stamp At A Time Blog Hop!!! Did you get to me by way of Lori? I sure do love her creations! 

Did you all enjoy your first full day of no political calls or commercials yesterday?? I must say that I am so glad to have all of that done and over with... I literally spent close to 13 hours in my craft room yesterday trying to get stuff done for my craft fair this weekend and of course I had to come up with a card for today!

This month, myself and all of the hoppers are creating with a "Let it Snow" theme. I went straight to the Christmas jugular! I mean how can I not when I am creating for craft fairs too! Now, lets get to the good stuff!!!


This fun card started with a base of Real Red card stock with a matte of the Candy Cane Lane DSP! I chose to use this DSP for my projects today because it is so amazingly cute! My Whisper White layer is stamped in Real Red ink with Be Jolly By Golly and it also the name of the set that it is from! I used the Scribble Thinlits to create my "snowy" hills. I actually die cut this twice out of Whisper White and then used the Dazzling Diamonds Glimmer Paper for the top layer! My cute little house is fussy cut from the Candy Cane Lane DSP with my Paper Snips. The Peppermint accents were created using the 1/2" Circle Punch with the DSP! They needed some sparkle so I added a few rhinestones to the centers before adhering them to the card with Stampin' Dimensionals! 

You will notice above that I made a fun Nugget Favor! These were so fun and easy to make! I simply cut my DSP in 1" x 3" strips and adhered them around the nuggets. I made a quick card stock tray for them to set in while wrapped up in a 2 x 8 Cello bag! 


This cute little reindeer is the Tag for the top of my nugget favor. The Cheerful Tag thinlits are so versatile... I even got to use my new Stitched Shape dies with always fun Cookie Cutter Bundle!


Here is a closer look at the card!

I am so glad you stopped by this month! This is the last one for the year... Pam Staples is next and I know that her creations will be beyond cute! See Ya Soon!!!
You can find a full list of the participants links at the bottom of the page!
 Pam Staples-Sunny Girl Scraps
Pam Staples


  • Andrea Tracy-Tucker (You are Here)
  • Tuesday, October 18, 2016

    Stamp Ink Paper 70 Tic Tac Toe Challenge!

    Hey Guys! It is Tuesday and I am designing for the Stamp Ink Paper Challenge!
    We are on challenge #70 so Lisa and Sandy cooked up a really cute Tic Tac Toe I know you are going to love!


    I have to admit I was a bit of an overachiever for this challenge! I really am out of FALL ideas! But I had everything cut and ready to go (even showed some of you!). So on my Tic Tac Toe I went straight across the top! Leaves, Green and Patterned Paper! 


    This tray is from a Stampin' Up! kit of long ago and I actually have two! I knew as soon as I opened the Hello Lovely Project Life set exactly what I was going to do!

    Creative way to make a Tic Tac Toe right?
    I can't wait to see how creative you get for this challenge!

    Tuesday, September 20, 2016

    Stamp Ink Paper 66 Anything but a Card

    Good Morning! Sorry I am a little late with my post! Had a little incident that included me slipping and possibly mildly spraining my ankle chasing a kid! Never a dull moment in this house! 
    This week with Stamp Ink Paper we have fun challenge for you! We would like you to make ANYTHING but a card! You can see that our design team had all sorts of ideas but since I am getting ready for a craft fairs I figured I would master this great little Calendar/Post it note holder! Guess what it is even better?? I will give you quick instructions!!!

    Get Details Here!


    I have been eyeing these easel card type things for a few years and just never have bit the bullet to do one! I started with a sheet of 8.5 x 11 Mint Macaron card stock and trimmed to 4.25 x 11. You will want to the other piece shortly so don't set it put it away just yet. I used my Stampin' Trimmer to do all my cutting and scoring. I then scored on the long side at 2.75 and 5.5 inches. You will want to fold this into a mountain like the pic above. For your card or calendar front you will want to cut it at 4.25 x 5.5 inch. So easy right??? I used the Petals & Paisleys DSP from the Holiday catalog with a lovely Very Vanilla matte. The ribbon for my bow is 3/8" Ribbon Trio Pack that goes with the DSP. I finally had an opportunity to use my Gold Binder Clips to hold my little calendar on! The card front still needed something... so I used the Paisley Dies and cut out some quick Gold Foil pieces to finish the project off! You may recognize my gold pen... It was from a blog hop post the other day but it went so well with this!

    Thank You! I have a full list of products below! Feel free to comment with questions! Have a great day!

    All items on this card are Stampin' Up! and can be found in my store!
    Cardstock
    • Mint Macaron
    • Very Vanilla
    Paper/DSP
    • Petals & Paisleys
    • Gold Foil 
    Embellishments/Trim
    • 3/8" Ribbon Trio Pack
    • Gold Binder Clips
    • Mini Staples
    Tools
    • Stampin' Dimensionals
    •  Big Shot
    • Magnetic Base
    • Stampin' Trimmer
    • Handheld Stapler
    Adhesive
    • Liquid Multipurpose Glue
    • Tear N Tape
    • Mini Glue Dots

    All items are available on my store! Just click below!
    My Store