

It is the first Wednesday of the month! We all know what that means. It is time for me to Inspire, Create and Share some fabulous creations using Stampin' Up! products with a bunch of my Stampin' Up! friends!
This month we have a Technique Hop and I am showcasing the Shaker Card technique! We all know I love my shaker cards! If you follow my blog this is my second post today... It is also my second shaker card! What does that tell you?
Justin Krieger is responsible for the shaker card monster I am today.. it is true!! He took the time to show me how to create a shaker via one of our FaceTime chats. When I make a shaker I try to make it the feature of my card. The Merriest Wishes bundle is PERFECT for a shaker. I had seen a card with a similar idea but I knew I wanted to take it to a WHOLE other planet!
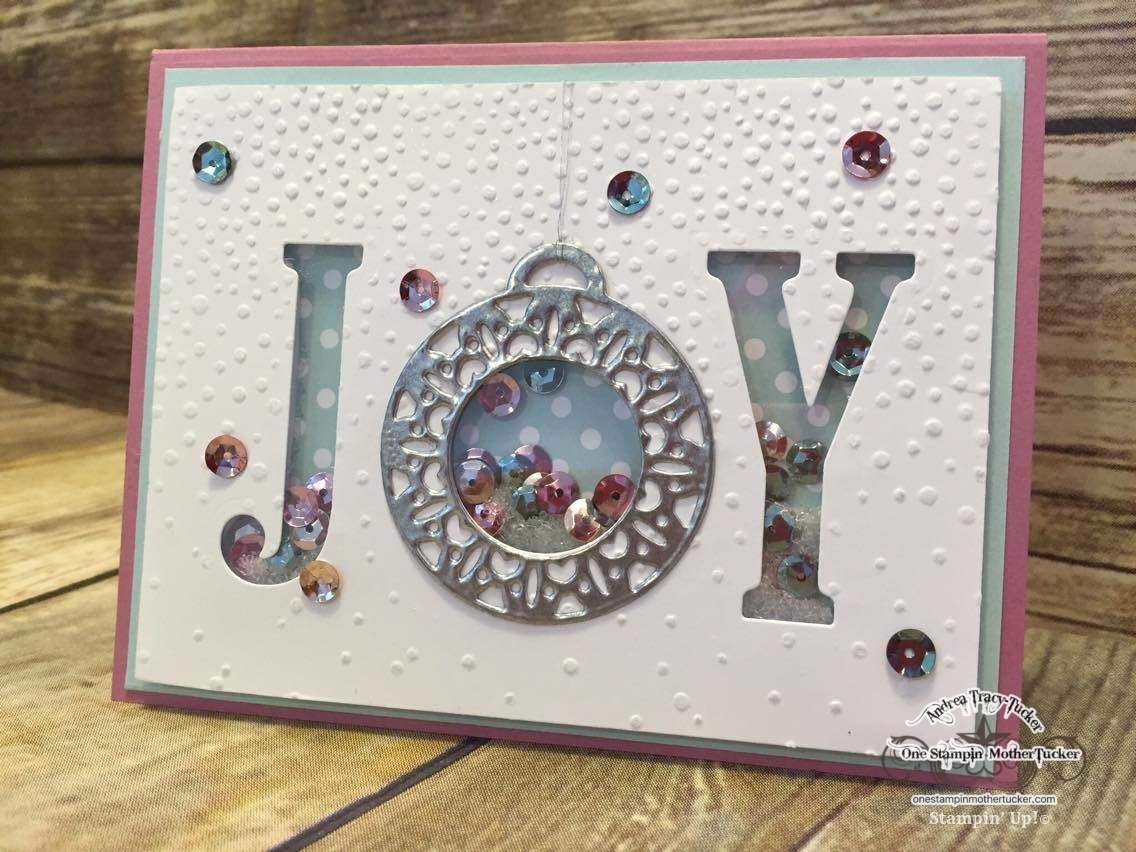
This idea has been festering in my head ALL WEEKEND LONG... and it was a long weekend. First thing is first, I actually die cut the Softly Falling embossed Whisper White panel. The letters J and Y are from the Large Letters Framelits. I set them on the Magnetic Platform with the die from the Merry Tag Framelits set. I got them set just right by using a ruler to make sure that they were level. Once running them through the Big Shot I got down to business. Here is a common mistake when adhering your Window Sheets, don't use glue!! Glue hardens and once it hardens your window panel can separate. We don't want that! I like to use Tear & Tape. I simply run it along the openings/windows of my shaker. This can be tedious!! I then use my bone folder to make sure my Window Sheet is good and stuck! On this card I wasn't quite sure how I wanted to do the shaker bits. Each window had its own shaker area... so in other words there are 3 different shaker elements on this card. Foam Adhesive Strips.... YOU NEED THESE! They are better than foam mounting tape!! They are skinny strips with just the right thickness of foam to give you room to shake away! I usually try to get as close to the edge of all of windows! The Foam Adhesive strips are 2 sided much like a Stampin' Dimensional, so once I had my 3 shaker "wells" done, I started adding my Fancy Frost sequins! I also had some snow like stuff to mix in as well. This sequin mix is where my colors came from! Soft Sky and Sweet Sugar Plum make such a fun color combo for Christmas! I like to use something simple for the background of my shaker! The polka dot pattern from the Subtle DSP stack was spot on so I adhered it to the Foam Adhesive strips. Now that the shaker element was finished I just needed to get my Merry Tag adhered to the front! Isn't that ornament the cutest? I actually heat embossed silver twice to make it look like metal! The card front was adhered to the Soft Sky matte using the foam adhesive strips and then adhered to the Sweet Sugar Plum card base. I added a few sequins and a strand of the metallic thread to finish my card off! PHEW!!!! Are you tired or inspired?? If you have questions feel free to email me or hunt me down on Facebook!
Now for Megan Thompson! She has a spooky technique to show you!
 |
| Megan Thompson |
This is a great shaker, Andrea!!
ReplyDeleteGirl, you rocked this shaker! I LOVE it! I really need these large letter framelits now as well as the Merriest Wishes Bundle! You've got to quit enabling me like this! :)
ReplyDeleteBeautiful card! I love shaker cards! Thanks for hopping with us this month!
ReplyDeleteAndrea, this card is fantastic! I love shaker cards and this one is gorgeous!
ReplyDeletewhat a fun shaker card. I love the colors!
ReplyDeleteThats an awesome shaker card!
ReplyDeleteReally pretty card!
ReplyDeleteIt's my favorite!!!
ReplyDeleteAmazing! I really need to make more shaker cards and didn't even think about making one with letters!
ReplyDeleteI LOVE this card! I made a shaker card with that thinlit set too, but mine was with the little deer and tree scene. Thanks for sharing!
ReplyDeleteThis is awesome!! I love this so much!
ReplyDelete